blog
Tag Archive for Papervision 3D at Jozef Chúťka's blog
April 2, 2010
Camera3D hover orbit Papervision 3D Scene3D smooth Viewport3D
Smooth Orbiting Camera in Papervision 3D
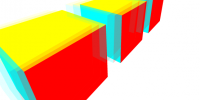
While working with papervision, I realized papervision is missing something like hovering camera (read section Orbiting your scene using the Mouse). I decided to simulate it by using Camera3D.orbit() method. And here is the result:
March 29, 2010
3d Facebook Papervision 3D sOliver
s.Oliver Rubik’s Cube

The Rubik’s Cube is a 3-D mechanical puzzle invented in 1974 by Hungarian sculptor and professor of architecture Ernő Rubik. My latest project was to create a 3D engine (I have used papervision) based on this logic + integrate with facebook. Finally, the game is ready and you can play s.Oliver ‘s Cube on Facebook.
March 4, 2010
BasicRenderEngine Cube DisplayObject3D Papervision 3D QuadrantRenderEngine sortMode ViewportLayer ViewportLayerSortMode z-sort
Fixing Z-sorting in Papervision 3D (update)
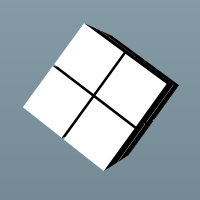
It may be very tricky thing to get papervision 3d scene rendered correctly event for the simpliest objects. In my case, I have created simple 3d scene with few primitive objects (8 cubes). Cubes are positioned close to each other to create shape of bigger cube + some small space between. Cubes are added into wrapping DisplayObject3D, later wrapper is added to scene in order to make it easy to rotate cubes as a group. Camera targets the center of the scene. In the demo, there are 3 sliders to rotate wrapping object in each x, y, z axis + two buttons that rotates wrapper in the problematic possition (based on z-sorting fix approach). Finally I managet it to work, you can follow my approaches below. Notice the changes are not cummulative, each approach comes from original Application.mxml. All of the ideas collected online from blogs, forums etc.
November 3, 2009
Augmented Reality Away 3D FLARManager FLARToolKit Papervision 3D pixel bender video tutorial
Quick tip: Augmented Reality – where to start
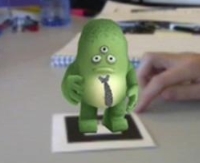
I am looking forward to work with augumented reality in next project. This technology seems to be fun, but for now I did not worked with it. So my first steps were to see some tutorials and examples and I want to share interesting stuff I came across. This video tutorial from Lee Brimelow gives you great preview of some examples and basics. Then your next step is to get FLARManager (wrapper for basic FLARToolKit) and one of the 3d engines away3d or papervision3d (would be a good choice).
More tutorials:
More examples:
http://www.boffswana.com/news/?p=392
http://ge.ecomagination.com/smartgrid/#/augmented_reality
http://www.livingsasquatch.com/
http://www.trick7.com/blog/2008/05/17-005233.php
http://saqoosha.net/2008/08/31/1221/
http://flash.tarotaro.org/blog/
November 2, 2009
BasicRenderEngine Camera3D Cube MaterialsList Papervision 3D Scene3D Viewport3D WireframeMaterial
Simple working Flex papervision 3d example
Today I started to play with papervision3d after a long time again. If you are looking for a simple scene example try this one:
<?xml version="1.0" encoding="utf-8"?>
<mx:Application xmlns:mx="http://www.adobe.com/2006/mxml" layout="vertical"
    applicationComplete="init()">
<mx:Script>
<![CDATA[
    import org.papervision3d.materials.utils.MaterialsList;
    import org.papervision3d.objects.primitives.Cube;
    import org.papervision3d.materials.WireframeMaterial;
    import org.papervision3d.render.BasicRenderEngine;
    import org.papervision3d.cameras.Camera3D;
    import org.papervision3d.scenes.Scene3D;
    import org.papervision3d.view.Viewport3D;

    private var viewport:Viewport3D;
    private var scene:Scene3D;
    private var camera:Camera3D;
    private var renderer:BasicRenderEngine;
    private var cube:Cube;

    private function init():void
    {
         viewport = new Viewport3D(pv3dCanvas.width, pv3dCanvas.height, false, true);
         pv3dCanvas.rawChildren.addChild(viewport);
         viewport.buttonMode = true;

         renderer = new BasicRenderEngine();
         scene = new Scene3D();
         camera = new Camera3D();
         camera.zoom = 10;

         var material:WireframeMaterial = new WireframeMaterial(0x000000, 1, 1);
         material.oneSide = false;
         material.smooth = true;

         var materials:MaterialsList = new MaterialsList();
         materials.addMaterial(material, "front");
         materials.addMaterial(material, "back");
         materials.addMaterial(material, "right");
         materials.addMaterial(material, "left");
         materials.addMaterial(material, "top");
         materials.addMaterial(material, "bottom");

         cube = new Cube(materials, 600, 600, 600, 1, 1, 1, Cube.ALL, Cube.TOP);
         cube.x = 0;
         cube.y = 0;
         cube.z = 0;

         scene.addChild(cube);

         addEventListener(Event.ENTER_FRAME, loop);
    }

    private function loop(event:Event):void
    {
        cube.rotationX++;
        renderer.renderScene(scene, camera, viewport);
    }
]]>
</mx:Script>
<mx:Canvas id="pv3dCanvas" width="100%" height="100%" />
</mx:Application>
Do not forget to add Papervision3D.swc into your project.